Let’s assume that you own a solid guitar, a decent amp, and a good set of pedal effects, yet you are still somewhat dissatisfied with your tone. You’re not alone because thousands of guitar players feel underwhelmed by what can best be described as “standard gear” accessible to an average guitarist.
Instead of wasting heaps of cash on improving bits and pieces of your equipment, you can start using or even building guitar mods. From small tweaks to major overhauls, I’m here to list some of the essential guitar modifications that can help you transform your guitar sound, so let’s start from the top.
Pot Upgrades
Potentiometers or “pots” can subtly affect your guitar tone, but it’s more important that they are functional. Regardless of make and model, they are designed to ensure your guitar’s controls for tone & volume work, so an upgrade is always welcome when they stop working reliably.

If you’re more interested in changing how your guitar sounds, you can choose new pots with different resistance levels. Low-resistance pots (100-250 Ohms) can make your tone a bit warmer while high-resistance pots (500-1,000 Ohms) can make it brighter.
To install your replacement pots, flip your guitar so that its back is facing toward you, remove the backplate, and carefully unsolder the old potentiometer before removing it.
Then Install the new pot by soldering it between the volume potentiometer’s 3rd lug and the ground; the output jack wire should be connected to the 2nd lug of the same pot, and the first lug of the volume potentiometer should be linked to the tone potentiometer. The remaining ground wires all go to the volume potentiometer.
If this sounds too complicated, you can always bring your guitar to a nearby guitar shop and ask the clerk to install the new pots for you; as a beginner, I used to pay around $5-6 for this service.
Pros:
- One of the cheapest ways to make your tone brighter/warmer
- Customize the way your guitar pots feel
- Individual pot replacements rarely cost over $20
Cons:
- Difficult for beginners
- Extra labor costs if you’re having pots replaced by a pro
Lock-in Guitar Straps & Accessories
One of the worst live-show experiences I have had is my guitar strap coming off in the middle of the performance multiple times. Not only did this ruin my focus, but it left me jaded and wondering when it would happen again.
This can happen again and again as long as you’re using “regular” straps, so I recommend a simple mod that is easy to install - lock-in straps and strap blockers.
Lock-in straps feature special hardware (usually pins and buttons) that allow you to manually lock or unlock the strap whenever you choose. Strap blockers, such as the ones Fender offers, are small rings meant to be placed above the strapping buttons on the guitar, keeping the strap in place.

Pros:
- No DIY skills needed
- An entire pack rarely costs over $5
Cons:
- Not stable enough to allow guitar spinning
Rubber Bridge
A simple way to make your “boring” guitar tone a bit more unique is to replace your current bridge with a rubber one. The downside with this mod is that you’ll need to make it yourself, but on the upside, it’s not only cheap and easy to do but it will also reduce the guitar’s string and wood wear.
You only need a block of standard-grade rubber, carve it to match the dimensions of your current saddle, engrave tiny holes with a file where the strings should fall, and place your new rubber bridge on your instrument.
This can be done on both electric and acoustic guitars. The rubber bridge will slightly dampen the strings at all times, almost as if you were continuously palm-muting them. A rubber bridge can open brand-new pathways to tonal experimentation, and in case you don’t like your new tone, you can always reinstall your old bridge.
Pros:
- An entire pound of rubber is dirt cheap at around $2
- Doesn’t physically interfere with the guitar’s parts
- Permanent palm-muting
Cons:
- Requires some DIY skills
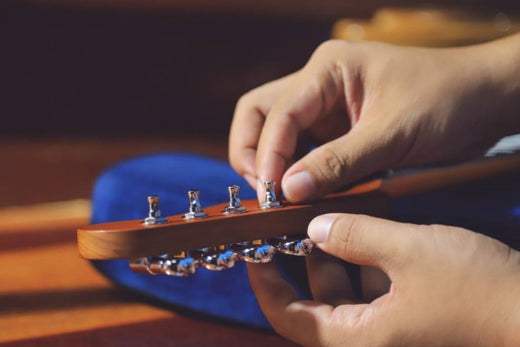
Tuning Peg Upgrades
So many guitar players I know are laser-focused on the guitar’s tone and feel, almost completely disregarding one of the crucial aspects of its performance - intonation.

If your guitar’s strings aren’t as stable as you'd like, there’s a good chance that the machine heads aren’t working as they should. Fortunately, upgrading the tuning pegs is one of the simplest operations you can do at home.
When browsing tuning pegs, make sure you get the array (layout) right - they’re not universal, and they should match the holes (and angles) on your guitar’s headstock.
The process of removing old and installing new pegs is a breeze. Unscrew the old machine heads, fit the replacements into their sockets, place the accompanying hardware on the posts, and you’re done.
Pros:
- Easy and quick to apply
- Replacement peg sets can be purchased for around $15-100
- Drastically improves intonation of old guitars
Cons:
- The specs of replacements must perfectly match your guitar
Neck De-glossing
Guitars with that shiny high-gloss finish may look appealing, but they are notorious for feeling extremely slippy when a bit of sweat gets on the wood.
Both vintage guitars brandishing a nitrocellulose finish and more modern ones with a polyurethane coat are affected by this. Entry-level instruments coated with an oil finish are almost unplayable for extended periods, but there is a simple fix - de-glossing.
This can be done with extra-fine sandpaper; anything above 440 grit can do the job, although even 100 grit “fine” sandpaper can be used if you’re extra careful.
A bit of trial and error is needed for this method to work. Gently rub the neck of your guitar with the sandpaper several times, and see how it feels the next time you play it. After a few days of “sweaty” playing, you should notice a difference. Keep repeating the process until your guitar feels more playable, but don’t overdo it with sanding.
Pros:
- Can make super-slippy guitars more playable
- A full pack of 100 sandpaper units (with varying grit levels) costs roughly $10, considerably less for individual units
- No DIY skills needed
Cons:
- Can aesthetically ruin guitars with ultra-thin finishes
Wrapping Up
Most of the mods I recommended won’t physically interfere with your guitar’s wood or hardware. Some are a bit easier to install (strap blockers and tuning pegs) while some may require a bit of time and practice (pots and rubber bridge specifically).
Using any of these upgrades can change the way your guitar feels, plays, and even looks, and the best part of it is that you can get them for pocket change.
If you like this article, please share it!
Be sure to join our FB Group Guyker Guitar Parts & Accessories Community to share your ideas! You can also have connections with like-minded guitar players, Guyker updates as well as discounts information from our FB Group.